
Returning to Physics -based rendering Having been away “real time” rendering for a little while now, I decided to use a more complicated eye than the “textured ball” method I’ve been using for some time. Eyes are clearly pretty important to a character, and the basic asset can be recycled as the need arises, so its a worthwhile endeavour to commit a few hours to coming up with something that can breathe a little more life into a face.
Cutting to the chase, Rather that straight-up sculpt an iris from scratch (which would still be relatively easy to do by sculpting with radial symmetry on), I decided to texture the model and use the colour information to deform accordingly.

Having quickly UVed my model in ZB, I incorporated a web-acquired iris image in Photoshop. There is the tricky question of iris size to contend with here – there was a bit of painting involved to get the desired pupil diameter (this is not for a human character). But aside from this, after a few colour-and-level-adjustment layers and masks I exported two files: a straight-up diffuse texture and a carefully-adjusted greyscale image to be used as a deforming “mask”.
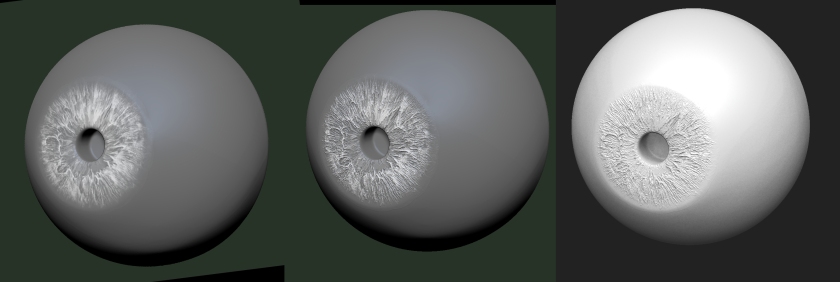
I imported this second image as an alpha and then after a “mask by alpha” I first blurred the mask and then “deformation>inflate”-ed it to get a little gentle topographical relief. I re-masked with the same alpha and deformed again to get a little more definition.

And that’s pretty much it – all you need for this is two models: a) The body of the eye with the iris and b) a “sclerotic orb” and convex cornea to give the iris that defracted look. A few tweaks of the materials in your renderer should give you some pretty powerful results.
What I like about this approach is its simplicity: You’re ultimately using an easily-acquired image file to deform a very simple shape.
